
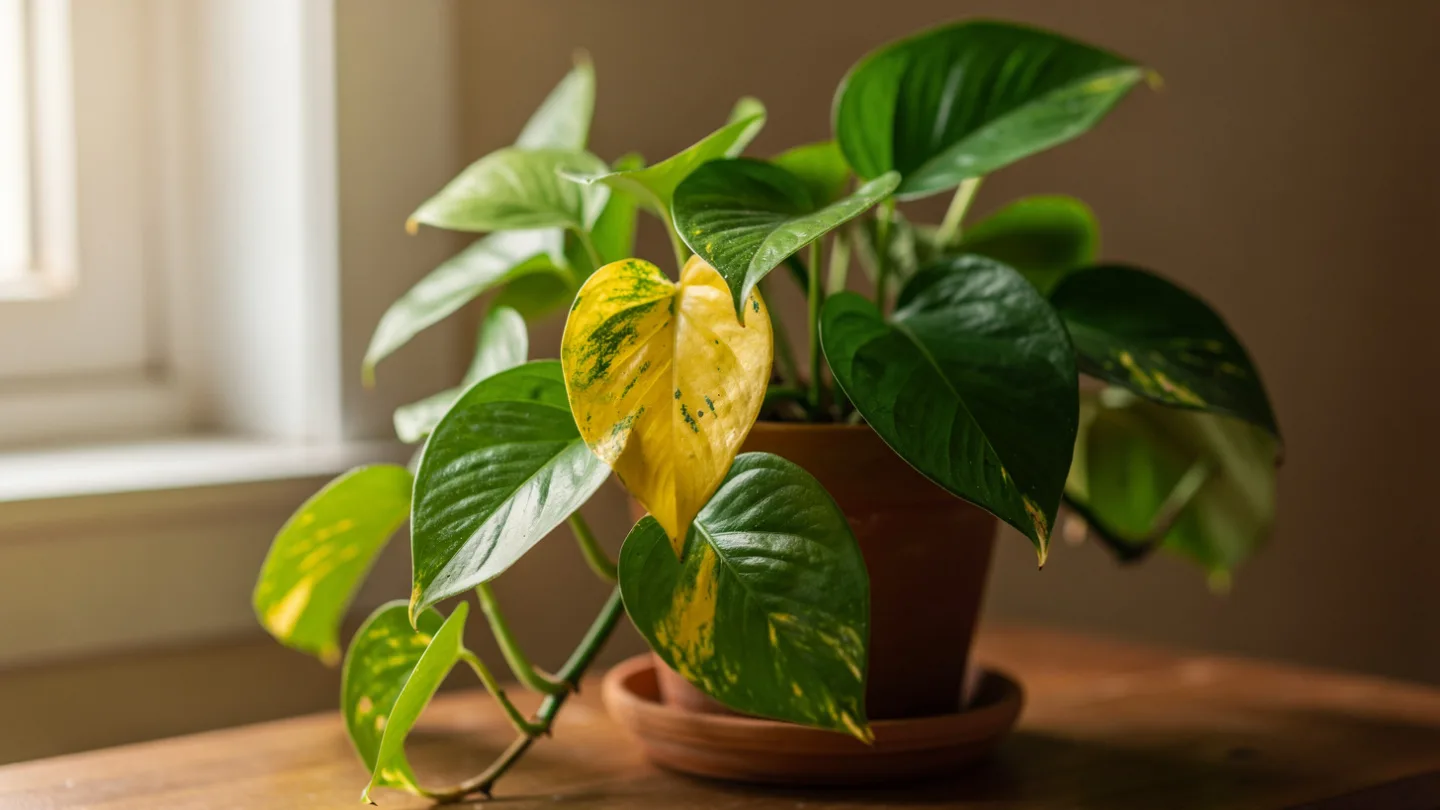
Why Are My Pothos Leaves Turning Yellow? (12 Causes + Real Fixes)
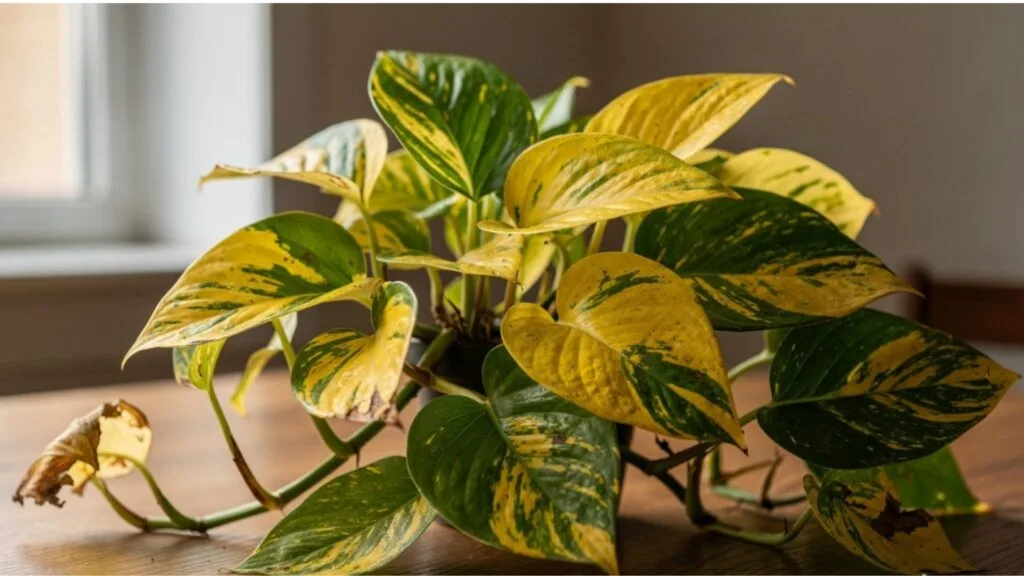
You bought a pothos because every plant guide called it impossible to kill.
Then one morning, you noticed it. A leaf, once deep green and glossy, had gone pale. Then another. Then three more.
Now you’re standing next to your plant, staring at yellowing leaves and wondering what went wrong.
Here is the truth: yellow leaves on a pothos are not a death sentence. They are a message. Your plant is telling you something is off, and once you figure out what, the fix is almost always simple.
This guide walks you through every cause, a clear diagnosis method for each one, and step-by-step fixes that actually work. No guessing. No wasted effort treating the wrong problem.
The short answer: Pothos leaves turn yellow most often because of overwatering, poor drainage, or incorrect light. The exact cause depends on what your specific symptoms look like. Use the diagnosis table below to find yours fast.
Before Anything Else: Match Your Symptoms First
Most plant guides list causes in random order. You read through all of them and still feel confused about which one applies to you.
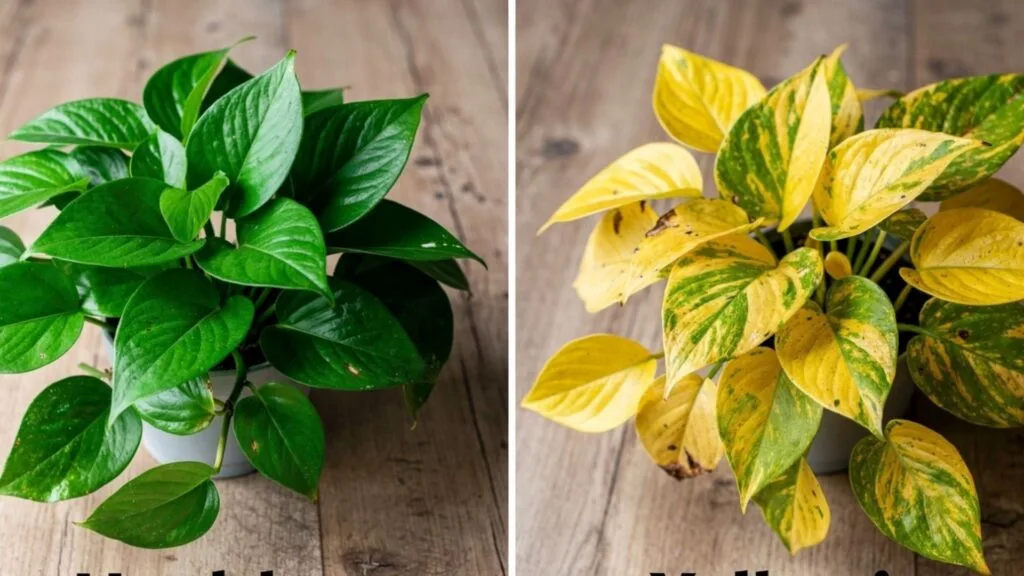
This table changes that. Find the symptom that matches your plant, and jump directly to that section.
| What You Are Seeing | Most Likely Cause |
|---|---|
| Yellow leaves, soft and mushy to the touch | Overwatering or root rot |
| Yellow leaves, dry and crispy at the edges | Underwatering or low humidity |
| Yellow AND drooping at the same time | Overwatering (check soil immediately) |
| Only the oldest, lowest leaves yellowing | Natural aging, completely normal |
| Pale, bleached-out yellow on sun-facing leaves | Too much direct sunlight |
| Yellow leaves, slow and leggy new growth | Not enough light |
| Yellow starting at leaf edges and tips | Excess fertilizer or poor water quality |
| Yellow with tiny brown dots or webbing | Spider mites or pest infestation |
| Yellow with brown spots and a yellow halo | Bacterial leaf spot or fungal infection |
| Yellowing after repotting or moving | Transplant shock or temperature stress |
| Yellow leaves but soil is completely dry | Underwatering, low humidity, or rootbound |
| Yellowing that gets worse every winter | Low humidity from indoor heating |
Found yours? Good. Jump straight to that section. If more than one symptom matches, start with the watering causes. They account for the majority of yellow leaves in houseplants.
1. Overwatering: The Most Common Cause
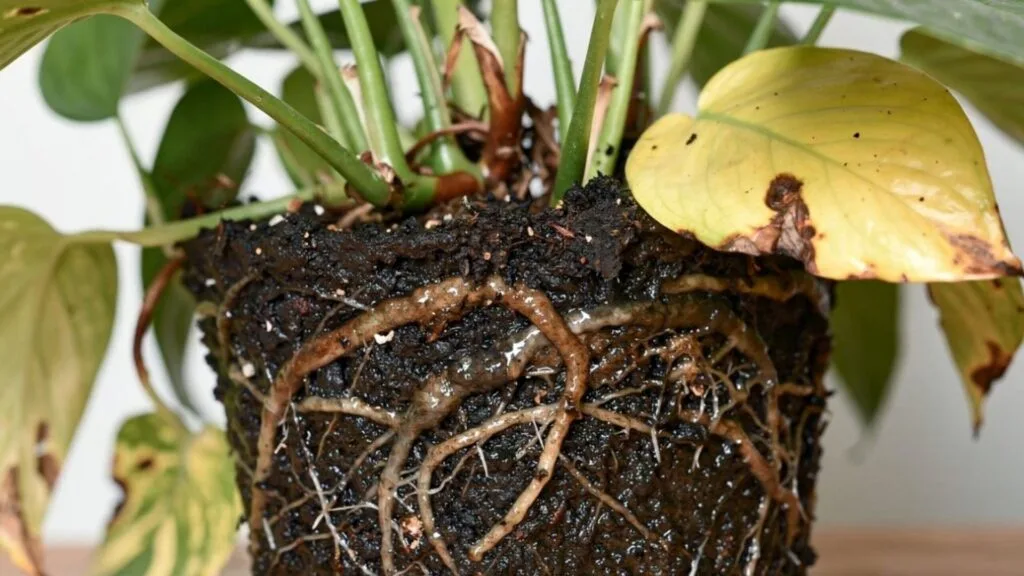
Let us start here because this is where most cases begin.
Pothos are native to the forest floors of tropical islands. In that environment, they experience dry periods between rains. Their roots are not built for soil that stays constantly wet. When you water too often, the soil stays soggy, and the roots run out of oxygen.
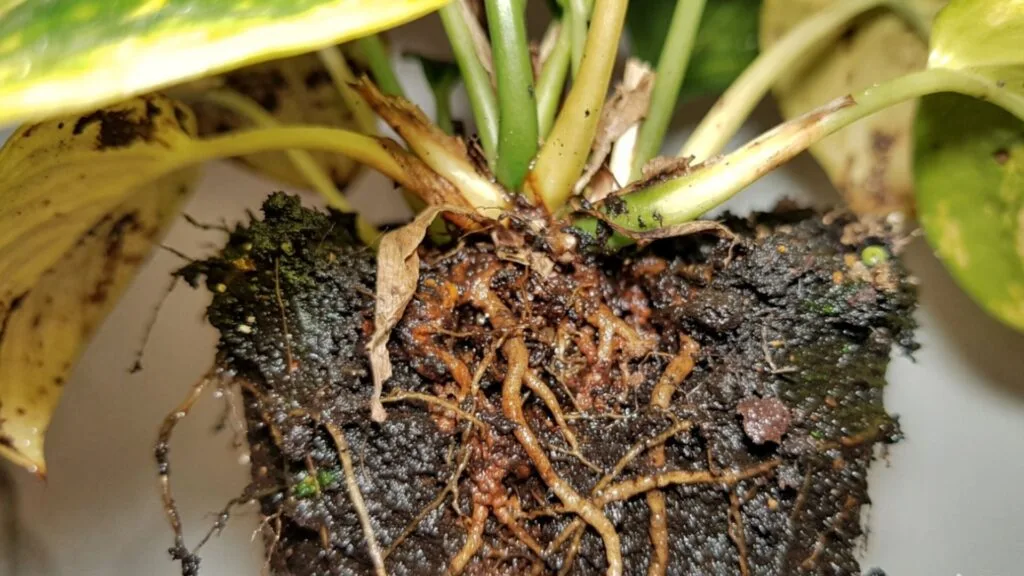
Roots need oxygen to function. Without it, they begin to die. Once the roots start dying, they cannot absorb water or nutrients anymore. The leaves lose their support system and turn yellow.
According to Clemson University’s Home and Garden Information Center, root rot from overwatering is one of the most common problems in indoor pothos care. The root system deteriorates silently underground while the plant looks normal above the soil until the damage becomes too severe to hide.
How to know if overwatering is your problem:
- The soil feels damp or wet even four to five days after your last watering
- The leaves are yellow AND soft or limp, not crispy
- You might notice a sour or rotten smell coming from the soil
- The stems near the soil line feel soft when you press them gently
- You may see mold growing on the surface of the potting mix
Why Are My Pothos Leaves Turning Yellow and Drooping?
Yellow and drooping together almost always points to overwatering. When roots rot, the plant loses its ability to move water upward through the stem. The leaves droop because they lack water pressure, then turn yellow as cells break down. Check the soil first. If it is wet or damp, overwatering is likely your answer. Stop watering immediately and let the soil dry out before doing anything else.
How to fix it:
- Stop watering right away. Place the pot somewhere with good airflow and bright indirect light.
- Wait two to three days. Then check the soil by pushing your finger two inches deep.
- If the soil is still wet, remove the plant from the pot and inspect the roots.
- Healthy roots are white or light tan and firm. Rotted roots are brown or black and feel mushy.
- Use clean scissors to cut away every rotted root. Cut back to the point where the root feels firm and white.
- Let the roots air-dry for 30 to 60 minutes.
- Repot into fresh, well-draining potting mix. A good mix is two parts standard indoor potting soil combined with one part perlite.
- Use a pot with drainage holes. No exceptions.
- Wait at least seven to ten days before watering again.
- Going forward, water only when the top two inches of soil are dry.
The one rule that prevents overwatering forever: Never water on a schedule. Always check the soil first.
2. Root Rot: When Overwatering Goes Further
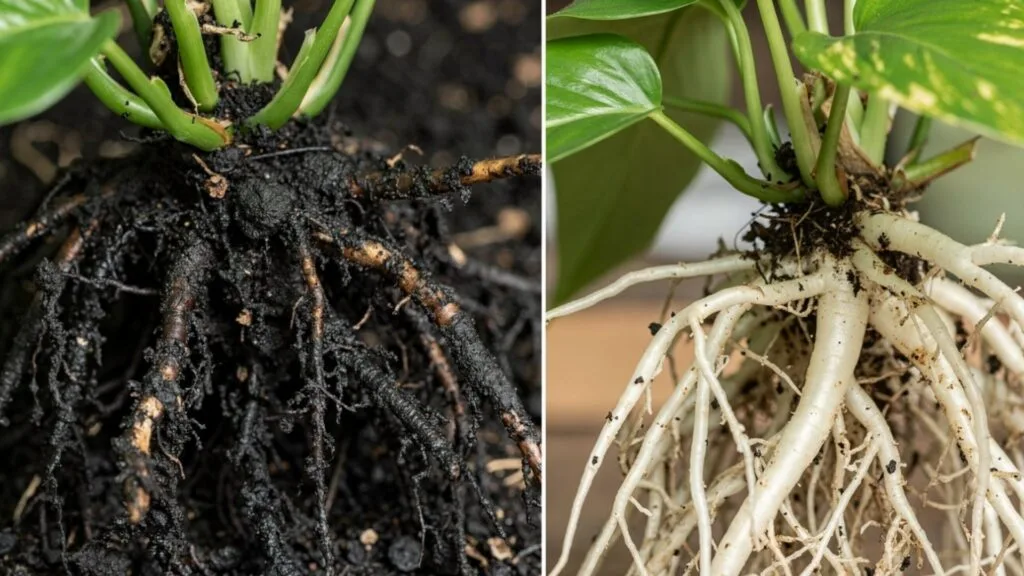
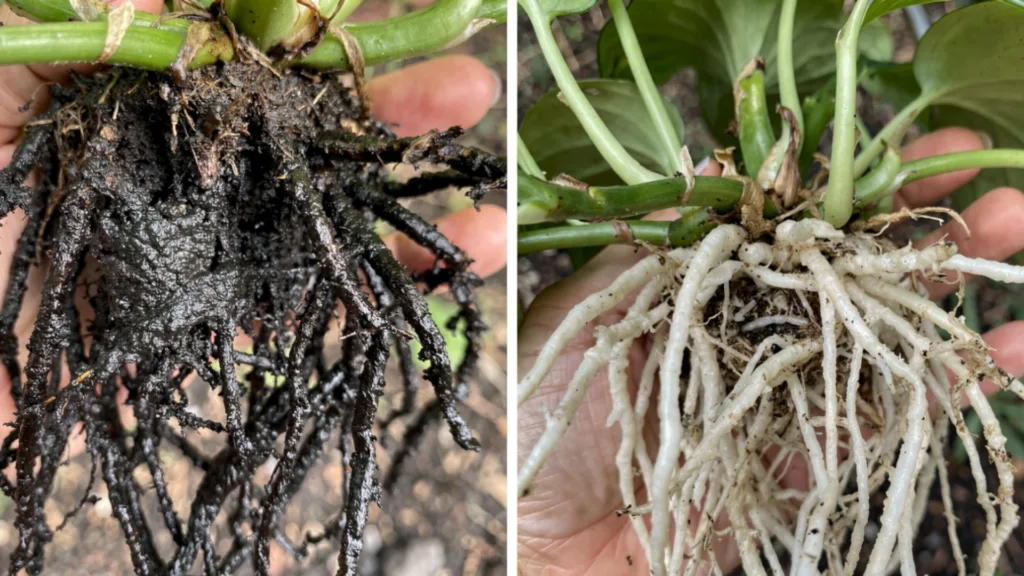
Root rot deserves its own section because it is not just “bad overwatering.” It is a distinct plant disease caused by soil-dwelling fungi, mainly Pythium and Phytophthora species, that thrive in waterlogged conditions.
You can develop root rot in a pot that drains reasonably well if fungal spores are present in the soil. Root rot spreads through the root system and, if ignored, works its way up into the stems.
Signs that separate root rot from simple overwatering:
| Sign | Overwatering | Root Rot |
|---|---|---|
| Soil smell | Normal or slightly sour | Distinctly foul, like rotten eggs |
| Stem condition | Normal | Soft and blackened near soil |
| Root appearance | Brown but still firm | Black, slimy, falls apart when touched |
| Speed of yellowing | Gradual | Sudden and spreads fast |
| Recovery after drying | Often recovers | Will not recover without intervention |
How to fix root rot:
- Remove the plant from its pot the same day you suspect root rot.
- Shake all old soil away from the root ball. Do not reuse this soil.
- Rinse the roots under room-temperature water.
- Cut off every rotted root with sterilized scissors. Clean your scissors with rubbing alcohol between cuts.
- Optional but effective: soak remaining healthy roots in a solution of one part 3% hydrogen peroxide to three parts water for 30 seconds. This kills remaining fungal spores without harming healthy roots.
- Let the roots air-dry for one to two hours.
- Repot in fresh, sterile potting mix in a clean pot with drainage holes.
- Keep the plant in bright indirect light. Do not fertilize for at least four weeks.
- Water lightly after one week, then return to a soil-check routine.
When to stop trying and propagate instead: If more than 60% of the root system is rotted and black, the plant cannot regenerate enough roots to survive. Take healthy stem cuttings from the unaffected parts of the vine and root them in clean water. Pothos cuttings root easily and will give you a brand new, healthy plant within two to four weeks.
3. Underwatering: Less Common, Still Real
Underwatering gets blamed less often than overwatering, and for good reason. Most people overwater more than they underwater. But some plant owners, especially those who have lost plants to root rot before, swing too far the other way and water too infrequently.
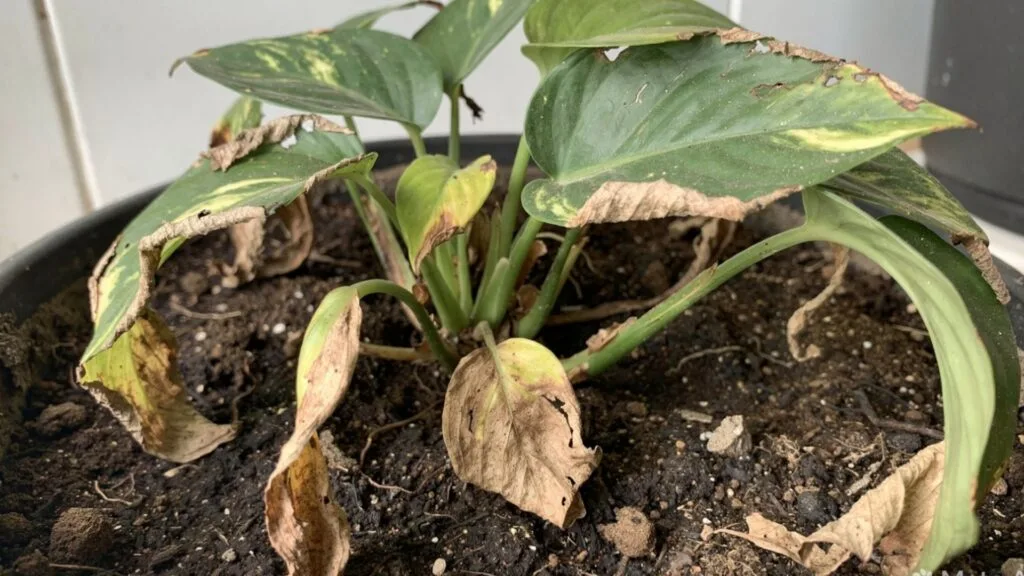
An underwatered pothos runs out of moisture in the soil. Cells lose their internal pressure. The plant cannot sustain all its leaves and starts dropping or yellowing the oldest ones first.
The tricky part is that overwatering and underwatering can look similar at first glance. Both cause yellow leaves. Both cause drooping. The difference is in the details.
How to tell them apart:
| Detail | Overwatered | Underwatered |
|---|---|---|
| Soil condition | Wet, dense, possibly smelly | Bone dry, pulling away from pot edges |
| Leaf texture | Soft, almost translucent | Dry, papery, crispy at edges |
| Stem feel | Soft near the base | Firm but limp |
| Recovery after watering | No improvement | Perks up within hours |
Pothos Leaves Turning Yellow but Soil Is Dry
Dry soil plus yellow leaves is a combination that confuses a lot of people. If the soil is dry, why are the leaves yellow?
There are three possibilities. First, the plant has been underwatered long enough that cell damage has already occurred. Yellow leaves from drought stress do not recover even after you water. Second, the plant may be rootbound. A tightly packed root ball cannot hold moisture efficiently, so the soil dries fast and the plant stays water-stressed. Third, low humidity combined with dry soil pulls moisture directly from the leaves. Check all three before deciding on a fix.
How to fix underwatering:
- Confirm the soil is truly dry by checking two to three inches deep.
- Give the plant a thorough, deep soak. Place it in a sink and let water run slowly through until it flows freely from the drainage holes.
- Let it drain completely before putting it back in its spot.
- Check the pot weight. A very light pot means the soil is dry. Use this as your cue going forward.
- Water when the top one to two inches feel dry, not when the entire root ball is bone dry.
4. Too Little Light: The Slow, Silent Problem
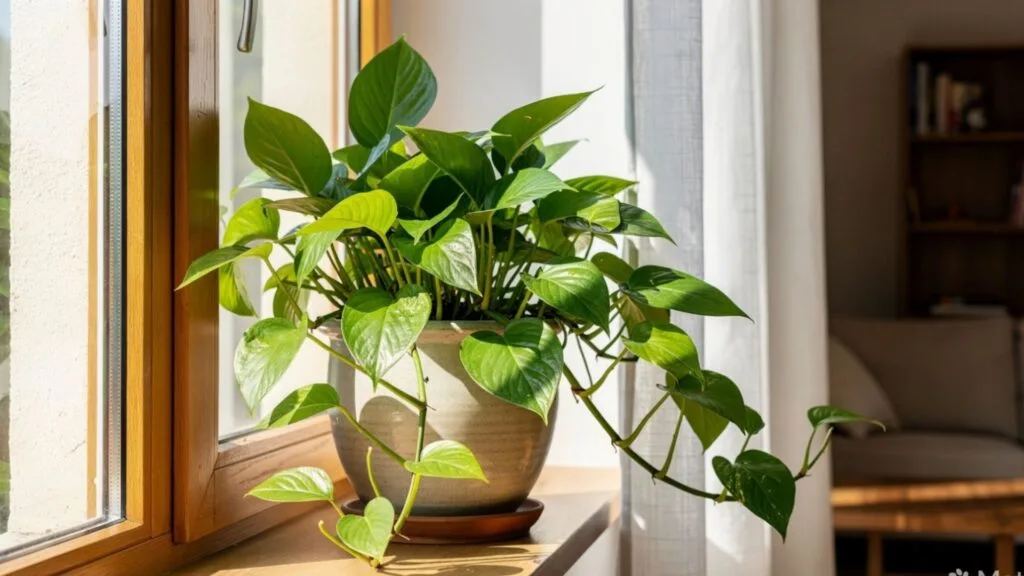
Here is a myth worth addressing: pothos tolerates low light. That is true. But tolerating low light and thriving in low light are two different things.
A pothos sitting in a genuinely dark corner, far from any window, will manage. For a while. Over time, though, the lack of light slows photosynthesis. The plant cannot produce enough energy to maintain all its leaves. It begins dropping the oldest ones, which yellow before they fall.
You will also notice the new growth becoming smaller, paler, and further apart on the vine. This legginess is the plant reaching desperately toward any available light.
Signs of a light problem:
- Yellow leaves combined with long, stretched-out vines
- Newer leaves noticeably smaller than older ones
- The plant is more than eight feet from a window
- Variegated varieties like golden pothos losing their yellow patterns, reverting to solid green
How to fix it:
- Move the plant to a spot within three to six feet of a window.
- East-facing windows provide morning light that is ideal for pothos.
- North-facing windows work but may need supplemental light in winter months.
- If no suitable window is available, a simple grow light running 12 hours per day solves the problem entirely.
- Rotate the pot a quarter turn each week so every part of the vine gets even exposure.
- New healthy growth should appear within two to three weeks.
5. Too Much Direct Sunlight: Sun Scorch
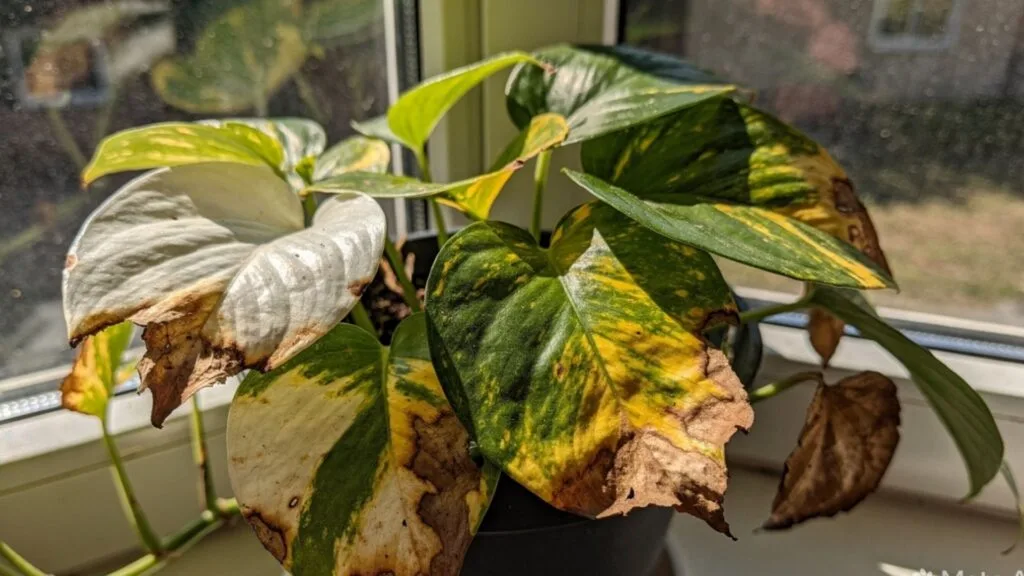
Pothos evolved under a thick forest canopy. In the wild, the leaves above them filtered and diffused the light before it ever reached them. Direct sunlight, especially through a south-facing window in summer, is far more intense than anything a pothos encounters naturally.
Direct sun scorches the leaf cells. The green pigment breaks down. Leaves turn pale, bleached, or washed-out yellow, often starting on the side closest to the window.
How to identify sun scorch:
- Yellowing is pale and bleached, not vivid yellow
- The worst leaves are those facing the window directly
- You may see crispy brown patches alongside the yellowing
- The problem worsens in spring and summer as the sun angle changes
Window placement guide:
| Window Direction | Light Type | Safe for Pothos? |
|---|---|---|
| East-facing | Gentle morning sun | Yes, ideal placement |
| North-facing | Soft, diffused light | Yes, good option |
| West-facing | Afternoon sun | Keep plant 3 to 4 feet back |
| South-facing | Strongest direct sun | Use a sheer curtain, or move plant well back |
How to fix it:
- Move the plant back from the window, or filter the light with a sheer curtain.
- Scorched leaves will not recover. Trim them off cleanly.
- The plant will push new, healthy growth once it is out of direct sun.
6. Low Humidity: A Winter Special
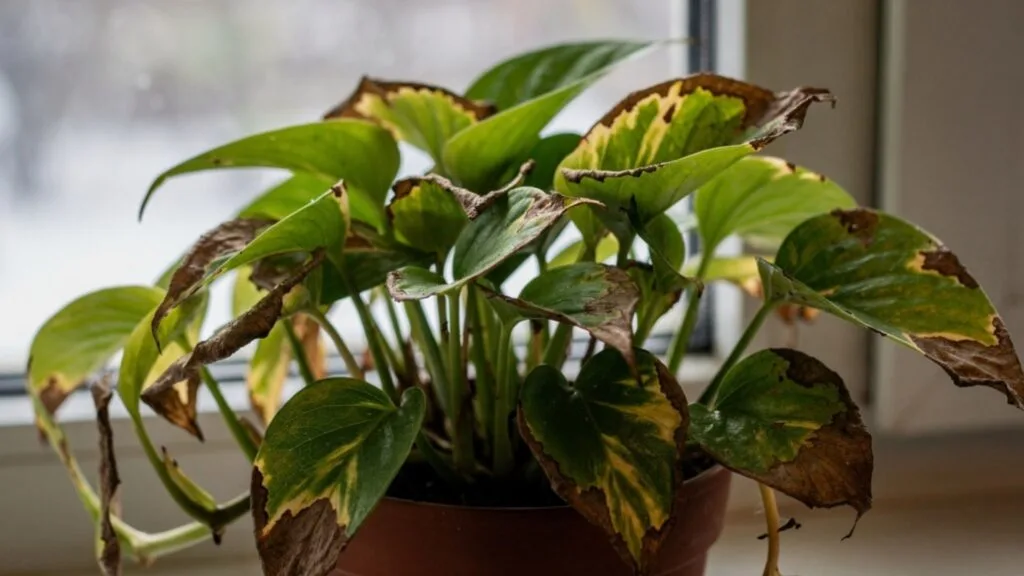
Most people never think about humidity. But if your pothos is yellowing and nothing else seems wrong, this is the cause to check next, especially between October and March.
Pothos are tropical plants. They come from environments with 60 to 80% humidity. The average American home drops to 20 to 35% humidity during winter, when heating systems run constantly. That dry air pulls moisture from the leaves faster than the roots can replace it.
The result is yellowing at the leaf edges and tips, often combined with a dull, slightly shriveled appearance even in a well-watered plant.
Why Are My Pothos Leaves Turning Yellow in Winter?
Winter yellowing in pothos is almost always a combination problem. Heating systems drop indoor humidity significantly. Light levels fall as days get shorter. Many owners continue watering on a summer schedule, which leads to overwatering in a season where the plant grows slowly.
The triple fix for winter yellowing: reduce watering frequency, increase humidity, and move the plant closer to its light source. These three changes together usually resolve winter yellowing within two to three weeks.
Humidity solutions compared:
| Method | Effectiveness | Cost | Effort |
|---|---|---|---|
| Group plants together | Moderate | Free | Low |
| Pebble tray with water | Moderate | Free | Low |
| Regular misting | Low (evaporates in minutes) | Free | High |
| Small humidifier nearby | High | $30 to $80 | Low |
How to fix it:
- Move the plant to a naturally humid room. Bathrooms and kitchens work well.
- Group it with other houseplants. Plants release water vapor through their leaves and raise local humidity together.
- Place a shallow tray of pebbles and water beneath the pot. Make sure the pot sits above the waterline, not in it.
- For the best and most consistent results, use a small humidifier near your plant collection during winter.
- Reduce watering frequency from your summer schedule. The plant grows slower, needs less water, and wet soil in dry air is still dangerous.
7. Nutrient Deficiency: When the Soil Runs Empty
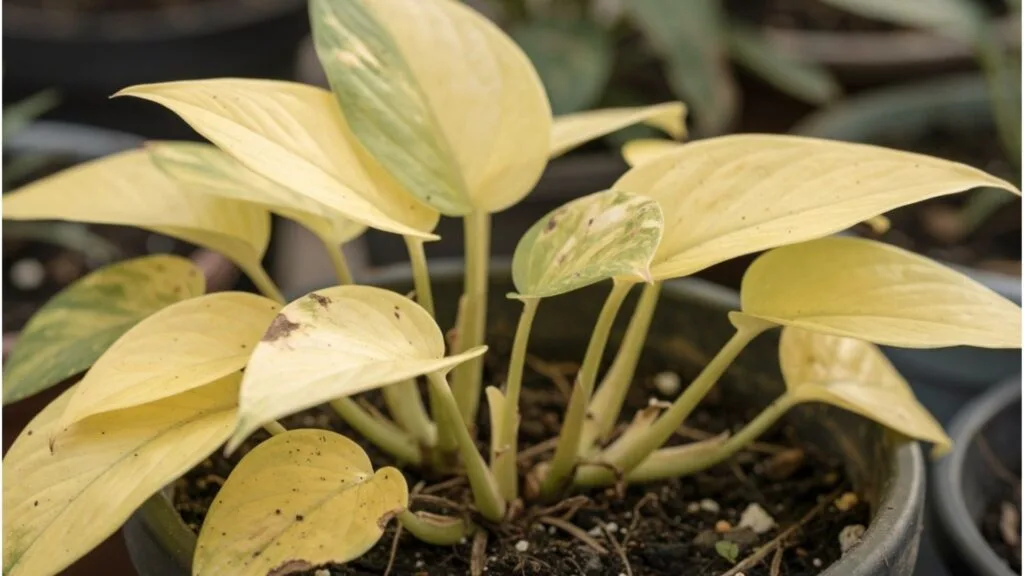
Pothos are not heavy feeders. You do not need to fertilize them often. But soil does not hold nutrients forever. Over time, regular watering flushes minerals out through the drainage holes. Old potting mix, especially anything more than two years old, loses most of its structure and fertility.
When nitrogen drops, leaves turn pale and yellow, starting with older foliage and moving upward. When iron is deficient, you see yellowing between the leaf veins while the veins themselves stay green. This pattern, called interveinal chlorosis, is a clear indicator of iron or magnesium deficiency.
Deficiency patterns at a glance:
| Nutrient | Where Yellowing Appears | Other Signs |
|---|---|---|
| Nitrogen | Older leaves first, uniform pale yellow | Slow growth overall |
| Iron | Between veins, veins stay green | New leaves affected first |
| Magnesium | Leaf edges, center stays green | Worse on older leaves |
| General depletion | Scattered across plant | No new growth for months |
How to fix it:
- During the growing season (March through September), feed with a balanced liquid fertilizer diluted to half the label strength.
- Apply every four to six weeks, not more.
- Stop fertilizing completely in October. Resume in March.
- Never fertilize a stressed, dry, or freshly repotted plant.
- If white crust has built up on the soil surface, salt has accumulated from excess fertilizer. Flush the soil thoroughly by running water through it slowly for five minutes and letting it drain fully. Repeat twice.
- If your potting mix is older than two years, repot into fresh soil rather than trying to fertilize your way out of it.
8. Pest Infestation: Small Bugs, Big Damage
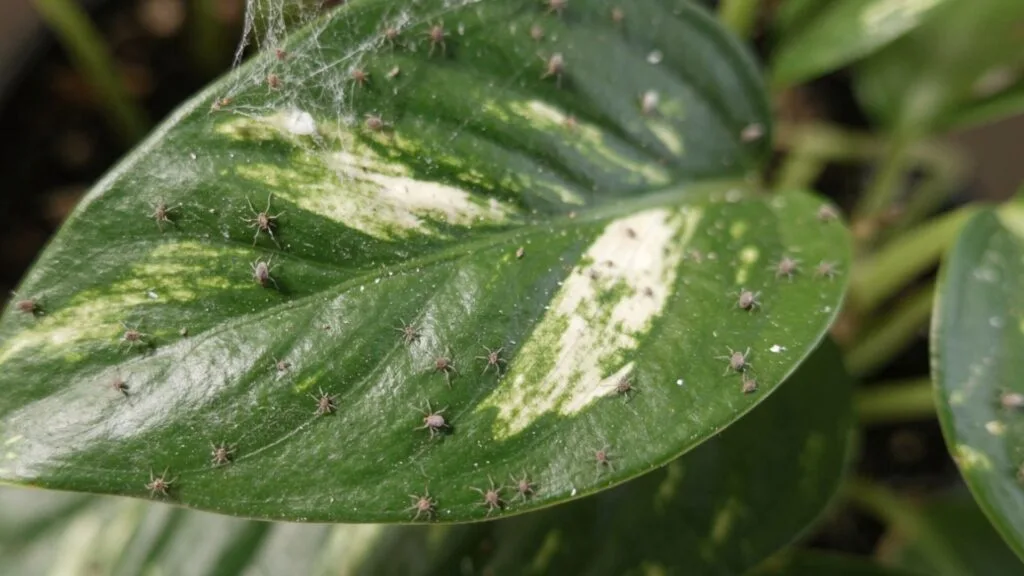
A weakened or stressed pothos is more vulnerable to pests. Spider mites, mealybugs, and scale insects all feed on the plant’s sap. As they drain the plant of moisture and nutrients, the affected leaves turn yellow and eventually die.
Spider mites are the most common indoor pothos pest. They are nearly invisible without magnification but leave tell-tale signs: tiny yellow dots across the leaf surface and fine, dusty webbing between stems and leaf joints. They thrive in low-humidity environments, which is why they appear most often in heated homes during winter.
Pest identification guide:
| Pest | What You See | Where to Look |
|---|---|---|
| Spider mites | Tiny yellow dots, fine webbing | Undersides of leaves, between stems |
| Mealybugs | White cottony clusters | Leaf joints, where stem meets soil |
| Scale insects | Brown shell-like bumps | Along stems, underside of leaves |
| Fungus gnats | Small flies near soil | Soil surface, around drainage holes |
Bacterial leaf spot appears as brown spots surrounded by a yellow halo. It spreads in wet, humid conditions and is not caused by insects but by bacterial infection. Remove affected leaves, improve airflow, and avoid wetting the foliage when you water.
How to fix a pest infestation:
- Isolate the plant immediately to stop the spread to nearby houseplants.
- Wipe every leaf surface, top and bottom, with a cloth dampened with 70% isopropyl alcohol.
- Mix a neem oil spray: one teaspoon of neem oil, one teaspoon of dish soap, and one liter of water. Shake well before each use.
- Spray all leaf surfaces thoroughly, especially the undersides.
- Repeat every five to seven days for three to four weeks. One treatment will not reach newly hatched eggs.
- For heavy infestations, switch to an insecticidal soap spray for faster contact kill.
- After treatment, increase humidity. Spider mites in particular cannot reproduce effectively in moist air.
9. Poor Water Quality: The Cause Nobody Mentions
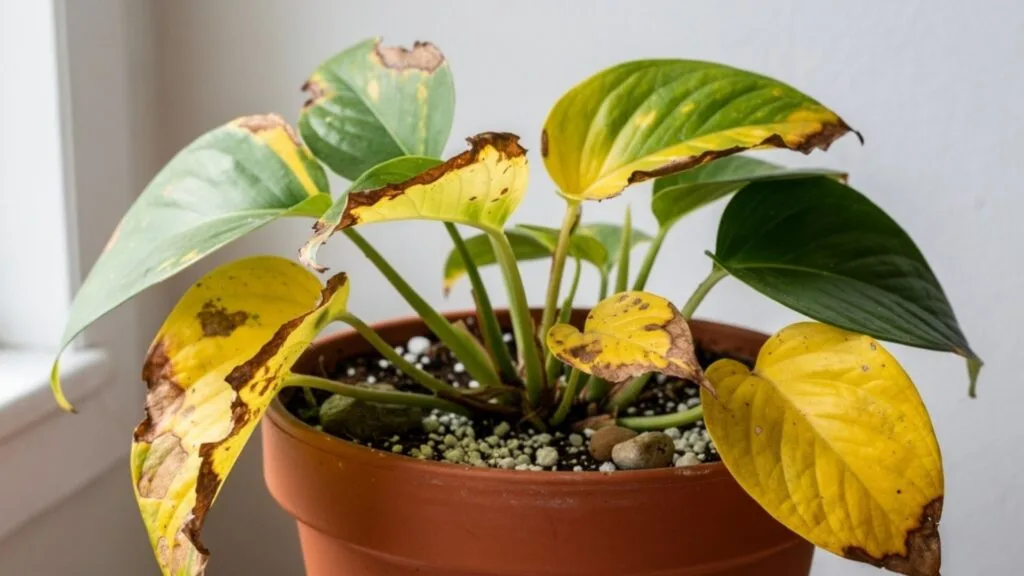
Most houseplant guides skip this entirely. The quality of water you use matters more than most people realize.
Tap water in many American cities contains chlorine, fluoride, and dissolved minerals. Over weeks and months, these compounds accumulate in the potting mix. The mineral buildup raises the soil’s salt concentration, which interferes with the roots’ ability to absorb water through osmosis. Leaves yellow at the edges and tips as a result.
You can often see the evidence directly: a white or yellowish crust on the surface of the soil or around the rim of the pot.
How to fix it:
- If you use tap water, fill a container and leave it uncovered overnight before watering. This allows chlorine to evaporate.
- Switch to filtered water or collected rainwater for long-term improvement.
- Every two to three months, flush the soil: water the plant deeply three times in a row, letting the water drain fully between each round. This washes accumulated salts out through the drainage holes.
- If crust buildup is heavy, remove the top inch of soil and replace it with fresh potting mix.
10. Rootbound: When the Pot Becomes a Prison
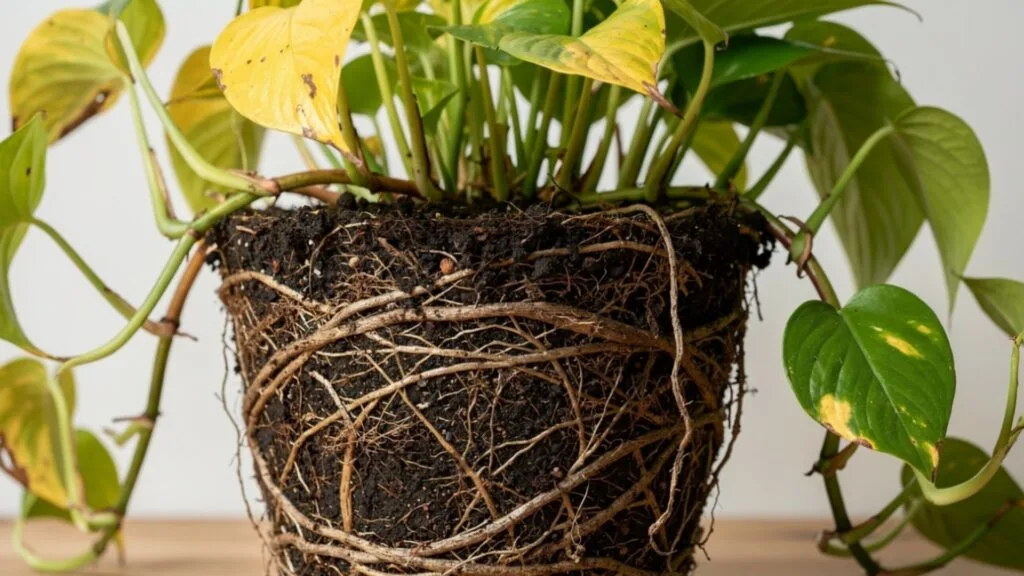
A pothos that has filled its pot with roots has nowhere left to grow. The dense root ball holds moisture unevenly, nutrition becomes restricted, and the plant struggles to sustain its existing leaves while trying to push new growth.
Rootbound plants also dry out much faster than normal because the roots take up most of the space where water-retaining soil used to be.
Signs your pothos is rootbound:
- Roots visibly growing out of the drainage holes at the bottom
- The plant dries out within two or three days of watering
- Growth has slowed significantly despite good care
- When you slide the plant out, roots circle tightly around the entire outside of the root ball
How to repot correctly:
- Choose a new pot that is one to two inches wider in diameter than the current one. Do not go larger than that. Oversized pots hold excess moisture and cause root rot.
- Use a well-draining potting mix. Add 20 to 30% perlite to standard indoor potting soil for better drainage.
- Gently loosen the outer roots with your fingers before placing the plant in the new pot.
- Fill in around the root ball with fresh mix. Press lightly to remove air pockets.
- Water thoroughly, then return to your normal routine.
- Expect minor leaf stress for one to two weeks. This is a normal adjustment, not a new problem.
- The best time to repot is spring, when the plant has the energy to push new roots into fresh soil quickly.
11. Temperature Stress and Cold Drafts
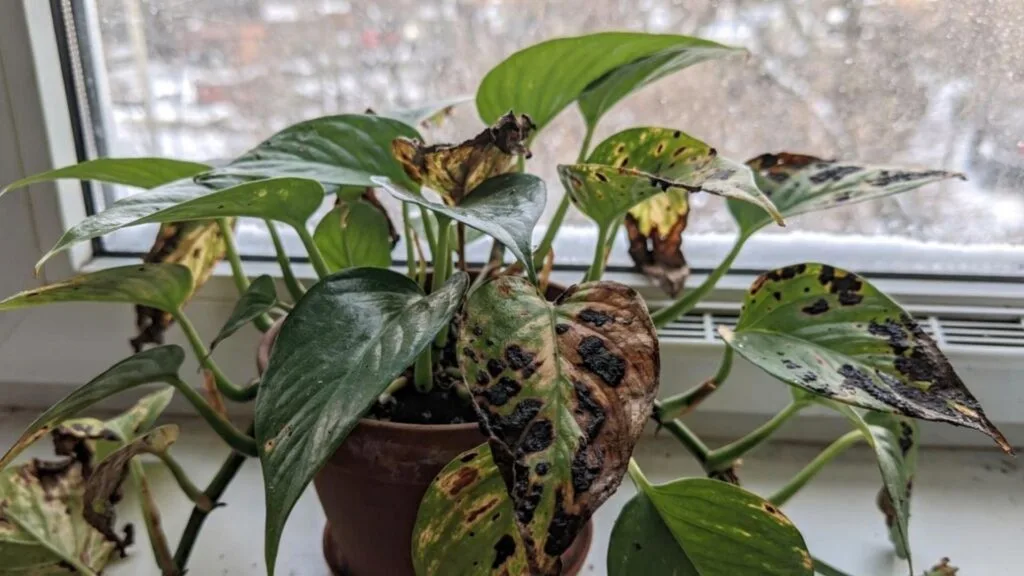
Pothos prefer temperatures between 65 and 85 degrees Fahrenheit. They are sensitive to sudden changes and to cold air exposure, even briefly.
A pothos sitting near an air conditioning vent, a drafty single-pane window, or an exterior door in winter will experience temperature stress. The cold disrupts cell function in the leaves. You will typically see yellowing on whichever side of the plant faces the cold source.
Research published in the journal Horticulturae confirms that low-temperature stress on Epipremnum aureum causes mesophyll cell collapse and leaf yellowing, even at temperatures that seem mild to humans.
Signs of temperature stress:
- Yellowing on one side of the plant only
- Leaves near a vent or window affected more than others
- The problem appeared after a seasonal change or after the plant was moved
- Yellow with slightly blackened or water-soaked leaf edges
How to fix it:
- Move the plant away from air conditioning vents, heating vents, and drafty windows.
- Keep the temperature around the plant consistent. Avoid spots that swing more than 10 degrees in a single day.
- In winter, remove plants from cold windowsills even if the glass does not feel drafty. The cold radiates through the glass and can damage leaves overnight.
- Give the plant two to three weeks to adjust after moving it before deciding if the problem is solved.
12. Natural Aging: Sometimes Yellow Leaves Are Normal
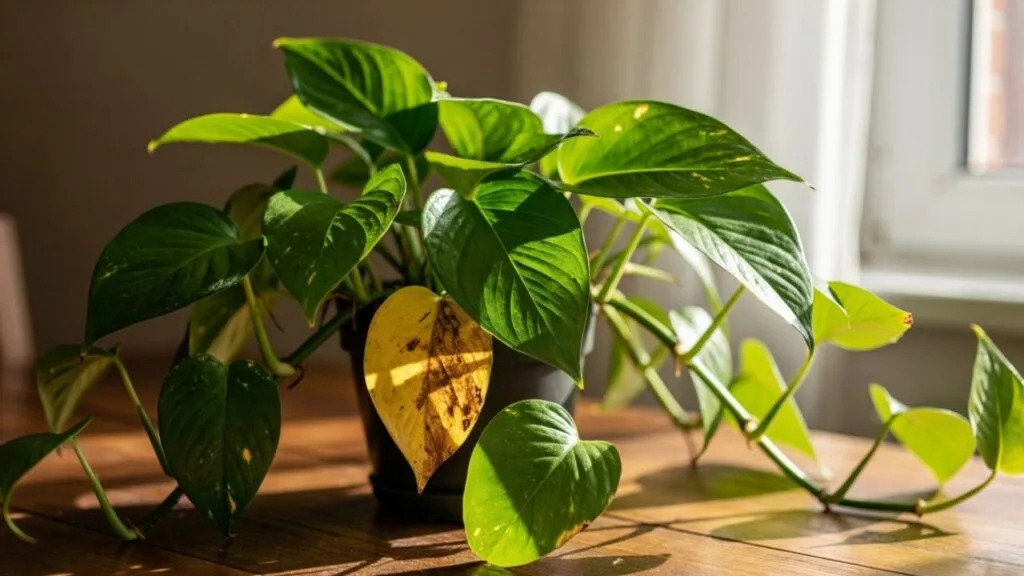
Not every yellow leaf is a crisis.
Pothos plants shed their oldest leaves as a natural part of their growth cycle. As a vine extends and pushes new growth at its tips, the oldest leaves at the base have done their job. The plant pulls nutrients back out of them, they turn yellow, and they drop. This is completely healthy.
How to tell natural aging from a real problem:
| Natural Aging | Problem Yellowing |
|---|---|
| One or two leaves at the base of old vines | Multiple leaves across the whole plant |
| Gradual, slow process over weeks | Multiple leaves yellowing at the same time |
| The rest of plant is green and growing well | New leaves also pale, small, or deformed |
| New growth at vine tips looks healthy | Growth has slowed or stopped |
If your plant is pushing healthy new growth while dropping one or two old leaves at the base, there is nothing to fix. Snip the yellow leaves off with clean scissors and move on.
Does Your Pothos Variety Change the Picture?
Yes, and this is something no competing guide covers clearly.
Golden pothos is the most common variety found in American homes. Its leaves are naturally variegated with yellow and green patches. New owners sometimes panic when they see the yellow portions of the leaves, thinking the plant is sick. The difference is clear once you know what to look for: natural golden pothos variegation is distinct, crisp, and patterned. Yellowing from stress is uniform, spreading, and appears on areas that were previously solid green.
If your golden pothos is losing its yellow variegation and reverting to solid green, it needs more light, not less.
Neon Pothos is naturally a bright, almost fluorescent yellow-green. The whole plant looks that color when healthy. If yours has always looked this way and is growing well, it is not sick.
Marble Queen Pothos has less chlorophyll than solid green varieties due to its heavy white variegation. This makes it more sensitive to overwatering and nutrient depletion. Yellow leaves on a marble queen most often point to water stress.
Devil’s Ivy, another common name for standard green pothos, behaves the same as golden pothos under stress but without the visible variegation to confuse the diagnosis.
Why Winter Makes Everything Worse
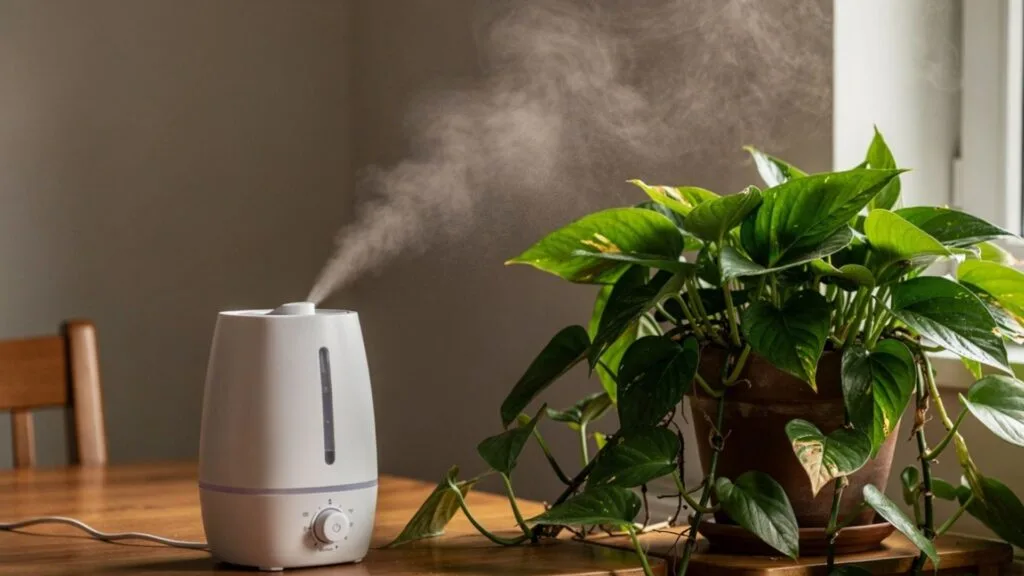
Winter creates a perfect storm for pothos yellowing, and it catches even experienced plant owners off guard.
Here is what happens between November and February in most indoor environments:
Heating systems run continuously. They dry out the air. Indoor humidity drops from a comfortable 50% to as low as 20% in some homes. At the same time, days get shorter. Natural light through windows drops significantly. Growth slows. The plant needs less water. But many owners keep watering on the same summer schedule.
The result is overwatered soil in dry air during a period of slow growth, precisely when the plant has the least capacity to recover.
Seasonal cause and fix summary:
| Season | Primary Yellow Leaf Risk | Main Fix |
|---|---|---|
| Winter | Low humidity plus overwatering | Cut watering frequency, add humidifier |
| Spring | Nutrient-depleted winter soil | Begin light fertilizing; consider repotting |
| Summer | Sun scorch through stronger windows | Pull back from windows; check for AC drafts |
| Fall | Transition stress as growth slows | Reduce fertilizer, ease off watering frequency |
Should I Cut Off Yellow Pothos Leaves?
Yes. Once a pothos leaf has turned yellow, it will not turn green again. The chlorophyll in that leaf is gone. Leaving it on the plant does not help recovery. In fact, removing yellow leaves is beneficial. The plant stops directing energy toward a leaf that cannot contribute to photosynthesis. It can redirect that energy toward new, healthy growth instead.
Use clean scissors or pruning shears. Cut as close to the stem as possible. Sterilize your scissors with rubbing alcohol between plants to avoid spreading any possible infection.
The Pothos Care Checklist: Prevent Yellow Leaves Before They Happen
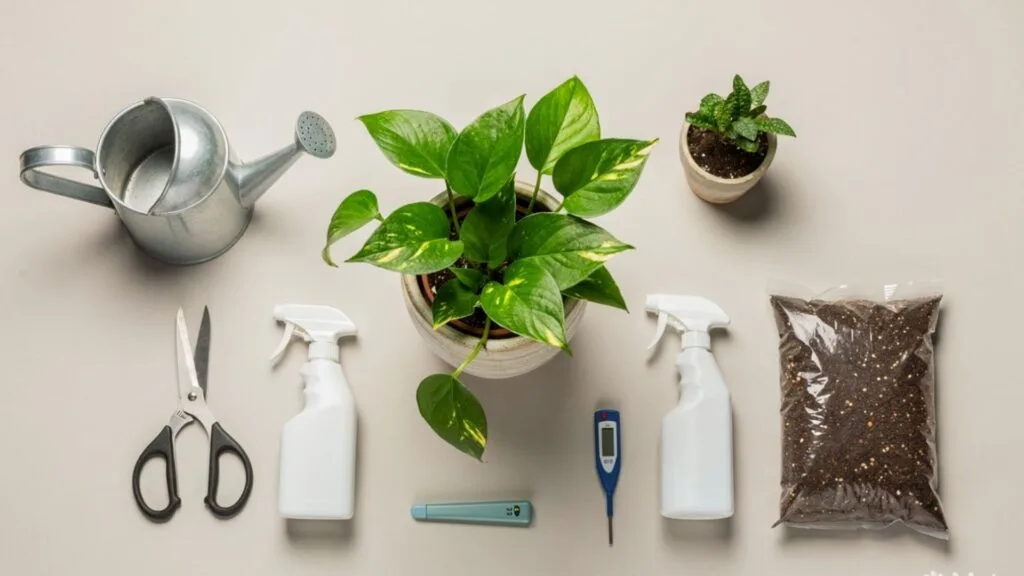
Use this as a reference for ongoing care.
Watering:
- Water only when the top two inches of soil feel dry
- Always water until it drains freely from the drainage holes
- Empty the saucer after watering. Never let the pot sit in standing water
- In winter, reduce frequency. The plant grows slowly and needs less
Light:
- Bright indirect light, ideally within three to six feet of a window
- East- or north-facing windows are safest
- Avoid direct sun through south- or west-facing glass without a curtain
- Rotate the pot quarterly for even growth across the vine
Soil and drainage:
- Use a well-draining mix with added perlite
- Every pot must have drainage holes
- Refresh the potting mix every one to two years
- Flush the soil every two to three months to remove mineral buildup from tap water
Feeding:
- Fertilize every four to six weeks from March through September only
- Use a balanced liquid fertilizer at half the recommended strength
- Do not fertilize in fall or winter
- Never fertilize a dry, stressed, or freshly repotted plant
Environment:
- Keep temperature between 65 and 85 degrees Fahrenheit
- Maintain humidity above 50% year-round, especially in winter
- Keep the plant away from cold drafts, AC vents, and heating vents
- Check for pests once a month, even when the plant looks healthy
FAQs
The Bottom Line
Yellow leaves on a pothos are not a mystery once you know what to look for.
Start with the symptom table at the top of this guide. Match what you are seeing to the most likely cause. Then follow the step-by-step fix for that specific problem.
In most cases, the fix involves adjusting your watering, your light, or your humidity. These three factors cover the vast majority of yellow leaf causes in pothos plants.
Get those three things right, and your pothos will reward you with lush, green, healthy foliage that stays that way.
Did this guide solve your problem? Leave a comment below and tell us which cause it was. Your experience helps other plant owners figure out exactly what is happening with their own plants.
References and Sources:
- Clemson University Home and Garden Information Center: How to Grow Pothos Indoors (hgic.clemson.edu)
- National Institutes of Health / PubMed Central: Outcomes of Low-Temperature Stress on Epipremnum aureum (ncbi.nlm.nih.gov/pmc/articles/PMC9506535)
- Gardenine.com: Pythium Root Rot and Bacterial Root Rot in Pothos
- Costa Farms Horticulturist Justin Hancock, quoted via real Simple/AOL Lifestyle (2024)